With security issues becoming more and more important, the emphasis on secure passwords (as well as other methods like multiple step authentication) has never been greater.
With that in mind I recently tried out several secure password managers to try and find something secure, but also easy to use and cross-platform.
First, I went to LastPass. It’s probably the most known tool for managing your passwords, and since it’s based on the web, it’s the most cross platform of them all. However, I found the interface lacking, and the number of tools and options on offer was overwhelming.
Next, I tried KeePass 2. While this is a perfectly capable app, very similar to the tool I’m going to talk about in a minute, it doesn’t provide official Linux packages, and the community ports, while serviceable, aren’t the nicest looking apps out there. So I tried other apps.
My favourite of all those I tested was KeePassX. It started out as a Linux port of KeePass, but eventually evolved as its own app. It bests KeePass 2 with a nicer, more native looking interface.
Using KeePassX in Ubuntu
Conveniently, KeePassX already has packages in Ubuntu available for installation.Install keepassx from the command line or install it from the Software Centre:
When you open it, you’ll see a blank window. Use the first button on the toolbar to create a new database. You can either protect it by using key files, or a password. You probably want a password which is quite easy to remember and type — you’ll be typing it in a lot, but on the other hand you don’t want anyone else accessing your database.
Next, you need to save it somewhere. I saved mine in my Dropbox, so I can access it from multiple locations. Dropbox uses two factor authentication, so if anyone wants to get into my Dropbox to access this database, they’ll also need to have my phone, which makes the process secure enough.
Alternatively, you can use other services like Google Drive and Skydrive which both use standard Authenticator apps, or Box which uses SMS for two factor authentication.
Of course, if you’re really worried about your passwords, you probably won’t want to save it where other parties can theoretically access it.
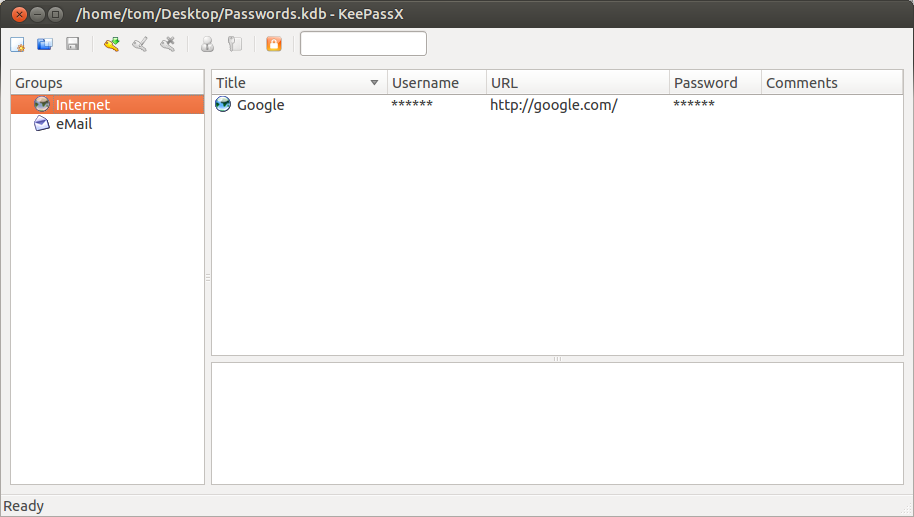
The main screen of KeePassX in Ubuntu
It’s important to note that some websites don’t always tell you how long a password they’ll accept, and opt to just put a limit on the input box. If your pasted in password doesn’t quite look long enough, it probably isn’t. It’s happened to me a few times.

KeePassX password generator
Copy & Paste Paranoia
You might be worried about the notion of copying and pasting passwords. It sure is more efficient than typing them out manually. By default, KeePassX clears the clipboard about a minute, but you can shrink this in the settings. You don’t need to be worried about someone else pasting the password and viewing it on your computer. You can also use a feature called AutoType,Database Dilemma
If you save the database in the cloud, don’t set the password to the cloud service to something completely random. It’s no good having the password to it saved inside the cloud if you can’t access the cloud. It might seem obvious, but it’s not something I originally realised.SECURE ALL THE PASSWORDS
Whipping out your phone constantly while at work or school to access your most commonly used accounts can be a pain, so keep that in mind when settings passwords.The future
If you’ve looked into KeePass 2 and KeePassX previously, you might’ve noticed that they use different database formats.KeePass 2 uses a newer version of the format, which offers things like custom fields. Even though KeePassX is not yet ready for the newer .kdbx format, a new version of it is in development which supports this format.
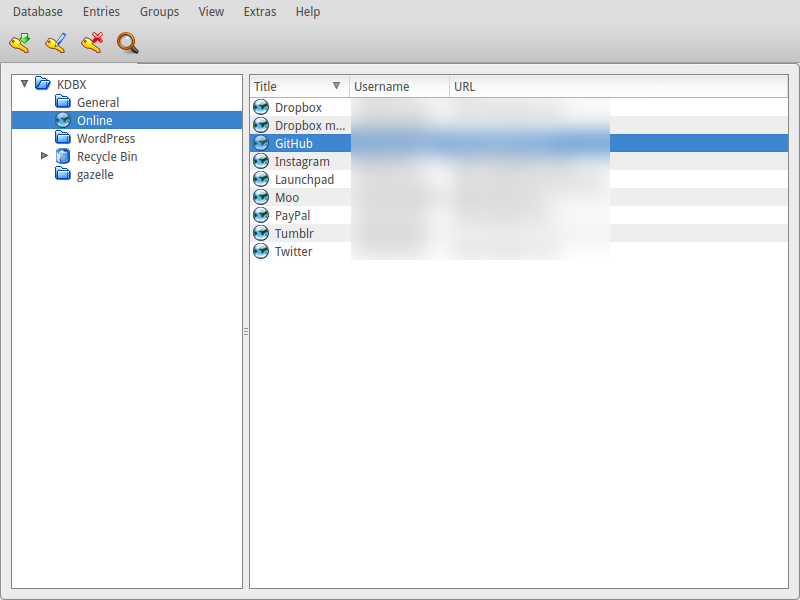
You can view the new version of KeePassX, with a vastly improved interface below. You can also download it to compile it yourself on GitHub.
-
- Main screen of KeePassX 2.0
-
- Details of a single password

-
- Additional attributes of a single password

-
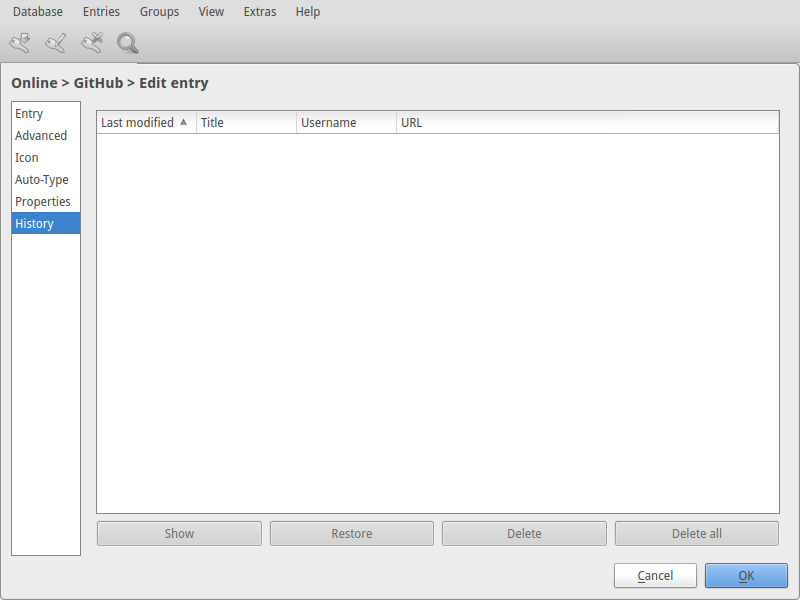
- Entry history, most likely replacing the ‘Backup’ folder from the previous version
-
- Settings in KeePassX 2.0

Other devices
As I said in the beggining of my post, I was looking for something cross platform. This is a great advantage of the .kdb format — there are quite a few apps currently supporting it. KeePassX is also much easier to get running on Mac OS X than KeePass 2, and runs fine on Windows too.On Android I use KeePassDroid, which works solidly both on my phone and tablet.
#http://www.omgubuntu.co.uk/2013/10/manage-passwords-securely-keepassx